Beautiful Card Designs Made Easy

November 30, 2016

Water Colour Wednesday-Lazy Rabbit

Hi Everybody,

This lazy rabbit just lying around is from the CD The Next Big Thing from Just Inklined

And every time I use this CD I have to tell you that it is no longer available

You may be able to find a copy if you search for it.

And if you already have it then take another look at the fantastic characters on there

It is such a good collection of all sorts from sports to florals and I use it regularly throughout the year for all occasions.

This one has been  water coloured a long time ago with Distress Inks and then mounted onto pink card.

It could do equally well for male and female cards ... obviously not with pink !!! 
 But I think this is such a cute rabbit and sat with the carrot was perfect for a friend who was retiring.  Best job in the World !!

More tomorrow ...

Hugs xx 

November 29, 2016

Tuesday Tutorial - Tudor Rose

Hi Everybody,

This pretty pale blue and white card would be suitable for all occasions and is not too frill for male cards either
 It is another that is easy to do as the die does all the work  for you all you have to do is cut and assemble the layers. 
 The centre shape matches the older Labels One that you may already have in your collection
Spellbinders Supplies:
Other Supplies:
Instructions:

With die #7 from the Matting Basics  A set cut two pieces of white card and create the base
With die #7 from the Matting Basics B set cut one layer in blue
With the two largest dies from the Tudor Rose Card Creator cut two panels in white and trim one of them so that the bottom flower and the leaves are separate 
Add foam pads to the back of the separated piece so that they cannot be seen from the front
Add the full panel to the blue layer and add to the base card
Cut the flowers from the Tudor Rose collection that match the flowers on the separated panel
(The photograph shows you where I have attached my flowers in blue and white layers)
Stamp and emboss the sentiment and cut out with Labels One then layer that on to die #3 from Luscious Labels One with foam tape in between
This shape fits beautifully into the centre part of the Tudor Rose Card Creator
Layer up the additional flowers on to the card front as you like and trim as needed

More tomorrow ...

Hugs xx

November 28, 2016

Tonic Studios - Zip & Buttons

Hi Everybody,

This pretty baby card is created with the dies from Tonic Studios and it is such an innovative little die set that you can have loads of fun with

It is called Zip and Buttons  and I really enjoyed playing with this set.

 I used card some of the Spotty card from AnnaMarie Designs and created a little jacket with the zip and Wild Orchid Crafts Guipure some lace

The sentiments is also from Tonic and is one of the New Baby Collection and I have cut mine in silver to add to the card

I am sure that you can come up with even more ways to use this simple concept  on your own cards and have lots of fun in the process

More Tomorrow ...

Hugs xx


November 27, 2016

Video Collaboration ....

Hi Everybody,

A little while ago I was asked if I would like to do a video collaboration with a fellow YouTuber and I was delighted to say "Yes"

My new YouTube friend is Olga Direktorenko and she makes the most beautiful cards.

Her blog is Building Your World and if you pop over there be sure to leave her a comment as you browse her pages.

So Olga and I decided that we would each make a card with a matching box or envelope and have a little "Give Away" at the same time.

This is the very first time I have ever done anything like this and so it is all new to me ... but I will learn how to do it better in the future

The photo shows you the set that I have made on My Video  Tonic Studios - Envelope Die Set   and I will be giving that and some flowers along with some pearl flourish too to one lucky winner. You will need to leave me a comment to win the "Goodies" 

There will also be a gift for you on Olgas Video  

The comments to win need to be left under the videos on YOUTUBE and not here. 
The winner will be announced on YouTube and I will add a blog post too on the 4th December

I hope you enjoy both mine and Olgas collaboration and hopefully there will be many more

More tomorrow ...

Hugs xx

November 26, 2016

Card Winner ...

HI Everybody,

An early start for me as I am going out for breakfast and then off to do some more cleaning at the restaurant. Jamie ( my Grandson) is hoping to be opening soon and I can't wait to see how it all turns out.

But I have done the draw for the Friday Freebie card this morning and the name chosen is yours ...

Judy E
could you email me your postal address please to 
christina@card-making-magic.com
and I will get it in the post to you straight away

I hope you will like it when it arrives and please let me know that you have it safely 

More tomorrow ...

Hugs xx


November 25, 2016

Friday Freebie 146

Hi Everybody,

Not many more Fridays to go now before Christmas and I hope you are all ready for the jolly season. We are frantically trying to get the restaurant ready to open and we have all been working really hard.
There has been an enormous amount of work done to make it a really lovely relaxing place to dine in 


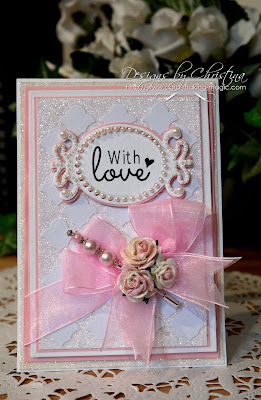
The card that I am giving away this week is in Pink with a double tied bow along the bottom

It is really elaborate with flowers and glitter and a beautiful hatpin into the display and the photograph does not do it the justice it deserves.

The inside is lined to compliment the front and I am sure that someone is going to love this one

So if you would like to have this card then all you need to do is leave me a comment at the end of the post.

From those comments a name will be chosen and given in tomorrows blog post 

Please come back and check if it is your name that is shown. as you only have 72 hours in which to claim it

More tomorrow ...

Hugs xx


November 24, 2016

December Sneaky Peak ...


Hi Everybody,

Well it's that time again when we are waiting in anticipation for this months magazines to be in the shops and dying to know what the free gifts are. There will be no disappointment with either of these two magazines and both will be on sale Thursday the 1st December

The first one is Simply Cards and Papercrafts 157 with a lovely layering Christmas Rose stamp set and matching die. 

A good one to get you started if you are new to layered stamps

This is an easy stamp set to use and the video   SC&P 157 - Altenew Christmas Rose  will show you how I created this card and give you more ideas of some  others that I have made.

The second magazine is Creative Stamping 37 and this has a fabulous A4 stamp set with lots of images and sentiments on it for use all year round

The video will show you how I made this aperture card using some of the images from the set and again this is an easy card to reproduce

CS 37 - Winter Garden  is sure to be a winner with you so don't forget to place your order with the newsagent to save you one.

You can take out a subscription,  then you won't miss future mags,  and it will be cheaper at  ... Moremags    Then you can make that cuppa and put your feet up while you browse the pages of your favorite magazine

More tomorrow ...

Hugs xx

November 23, 2016

Water Colour Wednesday - Spring Chicken ??

Hi Everybody,

I bought this stamp a while ago from the craft shows that I go to and it really made me smile.

It is a Woodware stamp called  No Spring Chicken   and the legs can be removed if you wished.

You can sit the chicken on her nest complete with as many eggs as you wanted

I have coloured her with Gansai Tambi water colours and pencils and tried to give her feathers.

But I think it would have been better with the shades darkened more

Even so I think this is a really cute  stamp set that would suit many occasions.

I will be using this again and varying the scene for another fun card

More tomorrow ...

Hugs xx

November 22, 2016

Tuesday Tutorial - Floral Affair

Hi Everybody,

This pretty card in lilac and white is a really simple layered card. The deep purple ribbon sets it all off nicely but there are no flowers on this one ... which is a bit of change as you know how I love to add my flowers.
Spellbinders Supplies:

Other Supplies:
Instructions:
With die #7 from Matting Basics A cut two pieces in white and Create A Hinged Card
With #7 from Matting Baiscs B cut a panel in lilac
With =6 from Matting Basics A cut another panels in white and emboss in any folder that you have
(Please remember that die #1 is always the smallest)
Cut the largest Floral Affair die in white a couple of times and glue them together. 
This just adds extra strength to the piece
Cut the fligree heart shape in lilac ... twice
Cut the Classic Heart die that fits under the filigree piece in white ... twice
Layer them together to create two hearts and add foam pads underneath
Assemble your card by adhering the embossed white card to the lilac layer 
Add the Floral Affair die cuts to the panel and wrap all of these with the ribbon 
Add them to the base card
Position the hearts as you like them 
Cut the sentiment several times and glue together then add across the hearts

Vary the colours and the sentiment for another occasion if you wish

More tomorrow ...

Hugs xx


November 21, 2016

Tonic Studios - Welcome ...

Hi Everybody,

Today I am featuring the really pretty Oval called Home Sweet Home  from Tonic Studios.

This die creates two good sized ovals that can be layered together ...  as I have done here or used independently.

The filigree centre piece can be used with either oval depending on the size of the frame you want around it

I used the large Welcome ... sentiment from the New Baby collection and cut this out four times and glued them together for a sturdy finish

The single flower is from Wild Orchid Crafts   and it has been added to some pink satin ribbon and the bow.

The striped paper has shades of pink and green in it and it was the green that I decided to pick out for the background panel.

The finished cards is 5x7 and it could be for any occasion with a different sentiment added.

More tomorrow ...

Hugs xx


November 20, 2016

Two Apologies !!!

Hi Everybody,

So I owe you two apologies this weekend and the the first one is for not publishing the name of the winner of the blue card from Friday. 
We were so busy yesterday at the restaurant and it was so late when we got home that I forgot all about it. 

The second one is for really stupidly publishing the Water Colour card on Friday without scheduling it for Wednesday. 
So some of you have had the sneaky peak of the Spring Chicken card and some of you have even left a comment on it already.

I removed it as quickly as I could but you were just too quick for me .... So Oooops! it will now be back on the correct day.

So to get to the winner of the card and the name that has been drawn is yours ....

Janet Kerner

so if you could kindly send your postal address to 
christina@card-making-magic.com
and the card will be on its way to you straight away.

I hope you will like it when it arrives and please let me know when it does.

More tomorrow ...

Hugs xx

November 18, 2016

Friday Freebie 145

Hi Everybody,

This is a card that was created in a video in 2013 and there is a page on my website about it 

With a title like that you can rightly assume that there are two other cards made with the same set of dies but in different styles and colours

You will find the links to all three videos on my website if you click the link above

I used the  Grand Decorative Ovals  which are now not available on the Spellbinders website.

It is quite a big card and has an A Frame back to make it stand. 

The video will show you exactly what I mean and it is another way to finish off your own cards.

So if this is a card that you would like to have then you know what to do .... leave me a comment at the end of the post.

I will choose a name from those comments and the card will be yours once you email me your postal address. So if you add a comment then please come back in the morning to see if it is your name that is shown

More tomorrow ...

Hugs xx


November 17, 2016

3D Stamping with Spellbinders ...

Hi Everybody,

This is a really new concept to stamping and it has been brought to the market by Spellbinders.

At first glance you may think that there is something wrong with your stamp but as you stamp it out it will add shadow and shading to your images without any help from you.

This is the Poinsettia that is in the collection of  3D stamps    and there are other designs for you to choose

Although the Poinsettia is traditionally for Christmas I just wanted to show you that it can be used for other occasions also.

How about a Winter Wedding in colours of the wedding theme, or an engagement card for the happy couple

I have added a Diamante corner to this card as that extra touch of luxury to the design.

And all the cards have been stamped with Distress Inks and the blue one is Blueprint Sketch


This one is Picked Raspberry and I have added the Birthday sentiment to this one with Diamante flourishes around the  centre panel

If you have any of these new stamps I hope you will enjoy playing with them and creating your own designs

More tomorrow ...

Hugs xx


November 16, 2016

Water Colour Wednesday - Boy with Teddy

Hi Everybody,

Today cards is using an image from the CD Pretty Tuff by Polkadoodles.

This CD has been around for some time but there are some really good images and they are all for boys.

You can print them off already coloured for you or just the line drawings for you to colour in yourself

Through your printer you can also resize them to suit the card or project you are  making

Here I have used Gansai Tambi water colours and add buttons along the side as decoration.

The blue spotty and striped card is from AnnaMarie Designs  and I have layered them all up with Kraft card onto a White base

  More tomorrow ...

Hugs xx

November 15, 2016

Tuesday Tutorial - Labels 47 Decorative Elements

Hi Everybody,

This really pretty card is created with well established Spellbinders dies and all the intricate work is done for you by the die. All you need to do is layer it all together for a lovely effect that can be for any occasion.
Spellbinders Supplies:

Other Supplies:
Instructions:
With die #7 from Matting Basics A cut two in white and create a hinged card
With die #7 from Matting Basics B cut another layer in yellow
With die =1 from Decorative Elements cut six panels in white and add them to the yellow panel 
(Die =1 is always the smallest)
Cut #3 from the filigree die in white twice (one is for the inside)
With =5 from Labels 47 cut two panels in yellow
With #2 from the Decorative Elements cut two in white
Stamp and emboss your sentiment and cut it out with die  #4 from Labels 47
From the Bitty Blossoms create the flowers in yellow and cut the leaves in green 
Roll them up and this video  Spellbinders Blossoms   will help you if they are a new concept to you 
Layer up the other die cuts with foam pads where needed and wrap with yellow ribbon before adding it to the base card
Add in the sentiment with foam pads.
Arrange the flowers as you like them
Add a bow to the front of the card and place the centrepiece over the knot.
Line the inside with the other die cuts to compliment the front

More tomorrow ... 

Hugs xx


November 14, 2016

International Ambassadors Informal Blog Hop

Hi Everybody,

Are you ready for another blog hop with some of the International Ambassadors?  
For this month we chose for our theme the approaching holiday season to make anything but a card
My choice was to use a die by a designer that is new to Spellbinders Marisa Job.

Marisa does beautiful work and I have been a follower of her for a long time.
But this is the "Surprise Me Box"  and it is part of her Special Occasions Collection 
It makes the most adorable little Crackers for your table and not just for Christmas. 
Imagine these all set out with your own colour scheme and each with a little gift tucked inside for your guests. 
They are not very big but they do make a statement and they are very easy to make. 
You will be able to get two from one sheet of A4 card.

I stamped plain white card with a snowflake pattern and then cut them out. 
I wrapped them with matching ribbon and added one of the little tags in the set stamped with a Christmas greeting.

I added in some leaves and a glitter star and they are ready to add to my table. I made quite a few ... but I can't tell you what is inside the Surprise Me Box !!
Why don't you pop over and see what my colleagues have designed for you to see ...

Linda Lucas    Australia
Yvonne van de Grijp  Netherlands

You are sure to be delighted with their designs. and don't forget to leave us all a comment to say that you have been to visit.

More tomorrow ...

Hugs xx

November 13, 2016

Ruby Update ...


Hello Everyone,

I thought I would pop in to tell you about my latest adventures in the big wide world

This is a new toy that my mum bought for me and it has lots of treats in it for me to sniff out.

 She said it would keep me quiet for ages ... but she was wrong ... I can clear all the treats from it in half an hour!!

Can you see my pink basket with all my toys in it?  I like to throw all the toys out and sit in it. It's just big enough for me and I can chew the handle while I am in there.

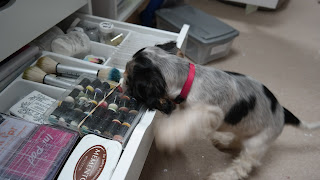
I also like to help my mum in her craft room and I get things out for her to play with coz I am really helpful !!

A new game I have discovered this week is to jump onto the drop down door of something my mum calls a dishwasher.

It's really good fun and as I hear the door opening I race across the kitchen floor  and launch my self on to it


Then on Tuesday my friend Dougal came to play and I stood on the top of the foot stool and that made me bigger than him so I barked and growled twice as much

We played till we where tired and then we both fell asleep on the rug until Dougals mum came to take him home

Bye for now ...

November 12, 2016

Card Winner ...

Hi Everybody,

So today is wet and cloudy and I have an early start and a busy day ahead. My Grandsons restaurant is coming along really well and today we are starting the job of cleaning to get things ready. The building work us almost finished and some of the decoration is done too.

Everybody has worked really hard to get it to this stage as there was an awful lot of work to do. But I have a fillet steak with my name on it once the restaurant is open.

The draw has been done for the winner of the card from yesterday and the name chosen this week is
Margaret Rogers

Please would you email me your postal address to
christina@card-making-magic.com
and the card will be on it's way to you straight away.
You have 72 hours to notify me

I hope you will like it and please let me know when it arrives with you

More tomorrow ...

Hugs xx

November 11, 2016

Friday Freebie 144

Hi Everybody,

So here we are with another Friday and the card this week is in peach and white

It is a 5x7 and the flower blend with the colour scheme beautifully.

What isn't shown on the photo is the hatpin that has been pushed into the flowers on the left and that really finishes the card off to perfection

I am sure that whoever wins this one will be pleased with the result.

Would you like this card to be on its way to you? Then all you need to do is leave me a comment at the end of the post and from those comments a name will be drawn and announced in tomorrows blog post.

You will need to come back and check if it is you and then email me with your postal address and the card will be on its way to you.

More tomorrow ...

Hugs xx

November 10, 2016

Cute characters ...

Hi Everybody,

These are some of the cards that are featured using the free gift that comes with
and today the video with this set is on YouTube for you to view. Just click the link to go straight there

The cute characters on the stamp set can be used in many arrangements

And although the stamp is described as mainly for Christmas it can be used all year round.
With a little imagination you can make cards for any occasion and dress it up any way you wish.

All I did here was stack the teddy bears on top of each other and I didn't even bother to mask them off.

Then I coloured them in pastel shades and added in a neutral sentiment

It would make an excellent childrens card and there is enough space on the card to add their name
With this one I was a little more adventurous and I hand drew a circus scene behind the performing seals

I cut the number from the red
Glitter Card   that is available from Craft Stash

I added the ball and the bottle to the noses of two seals and added a bow tie to the third one that is on the circus stand

I hope you will have fun if you buy this magazine and it will be in the selected supermarkets and craft shops today.

You can also get it from WHSmiths or direct from Moremags. If you subscribe you will be sure never to miss your copy ans the super free gifts that will be coming in the future

More tomorrow ...

Hugs xx


November 09, 2016

Water Colour Wednesday - Get Well Soon ...

Hi Everybody,

Here's a little card that I had some fun creating a while ago and I made it as a get well card.

The image is from the CD The Next Big Thing by Just Inklined and it is one I have used many times.

There are lots of fun images on that CD and if you have it then it's time to look at it again in case there is something that you missed.

If you don't have it then you will need to search for it as it has been discontinued for quite a few years now

To create this card I use only blues and deepened the shadows by being a little heavier with the colour.

The Get Well Soon was simply hand drawn in squiggly lines around the edge of the card and it's not supposed to be neat and tidy.

It gave the recipient a good laugh when it was given and that has to make you feel better straight away

More tomorrow ...

Hugs xx